
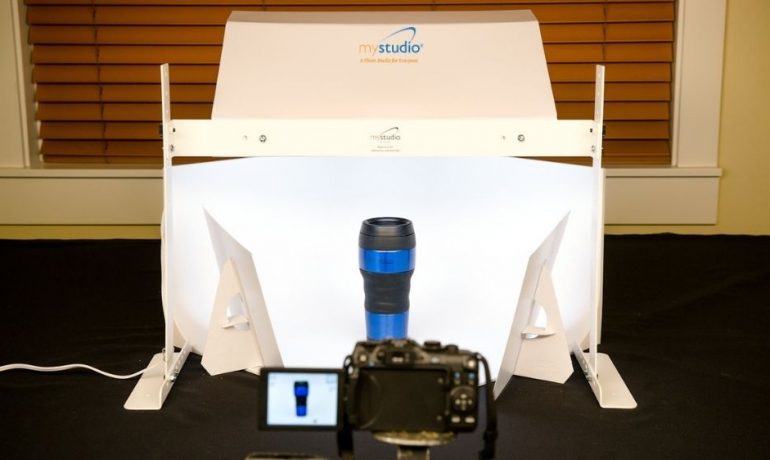
Set the Stage
First decide what kind of light you want or have for your photoshoot. It is very possible to take high-quality photos without any special equipment. That being said, using direct natural light like from a door or window is far less consistent, oftentimes is not very adjustable, and it can also cause unwanted shadows. In order to use natural light to your advantage, remember this: keep it indirect! That means the sun is not actually shining on the product; instead, it is reflected and softened from the light bouncing off another surface like a wall or table.
Now, for those of you who have invested in any type of artificial light – the world is your oyster! There are so many ways to set up lights indoors. Specifically for product photography, here are some key lighting tips that will make your products stand out and highlight all of their key features.
Continuous vs. strobe lighting
Continuous lights are lights that are either on or off, and can sometimes be dimmed (typically LED panels). Strobe lights use flashes or bursts of light that last a fraction of a second but can be thousands of times more powerful and continuous lights. With strobe lights, you may need to adjust your shutter speed to capture the amount of light that best enhances your product. Both types of lights can produce great results so long as the camera’s shutter speed is adjusted. If you are using a table top photo studio, also called a lightbox, then you are most likely using continuous lights. This is far easier and more consistent. It is always recommended to shoot in Manual mode on your camera so you can control the exposure rather than relying on the camera’s “Auto” mode which is far less reliable. Finally, “daylight” lighting is preferred for the most accurate color reproduction. Use lighting with a 5000K color temperature.
Control and “reflect” your light
When using one or more “off-camera lights”, or any light not attached to your camera, try using bounce card reflectors, which are generally white. For best results, use the bounce cards to add fill light and/or shape to your photos by focusing more light on certain areas. Position the cards in front of the main lights and to the sides of the item(s) you are photographing. Move the cards around at different angles and positions to see the effects on the product until you find the best look to your taste.
Accent lighting
If you have accent lights (extra lights in addition to your main, or “key” light, try to place them in both the front and slightly to the sides, and also at the back of the product. This is called side lighting and backlighting. For the front/side lighting, try to place the accent lights in front of and 45° to either side of the item being photographed. Position the lights at the same level or slightly higher than the product and angle it downward. The light in front will highlight the product features, and the light from behind will make the product stand out from the background.