

We all know that in the e-commerce world, your product photos are essentially your storefront. High-quality images can make or break a sale. As someone who’s been in the trenches of product photography, I’ve seen (and made) my fair share of mistakes. Let’s dive into some common pitfalls in product photography and how to sidestep them to create those stunning, sale-driving images.
Mistake 1: Inadequate Lighting in Product Photography
Light: The Make-or-Break Factor
First, bad lighting can make your product look flat, uninviting, and sometimes, downright unrecognizable. It’s the critical difference between a product that ‘pops’ and one that flops in product photography.


Solutions:
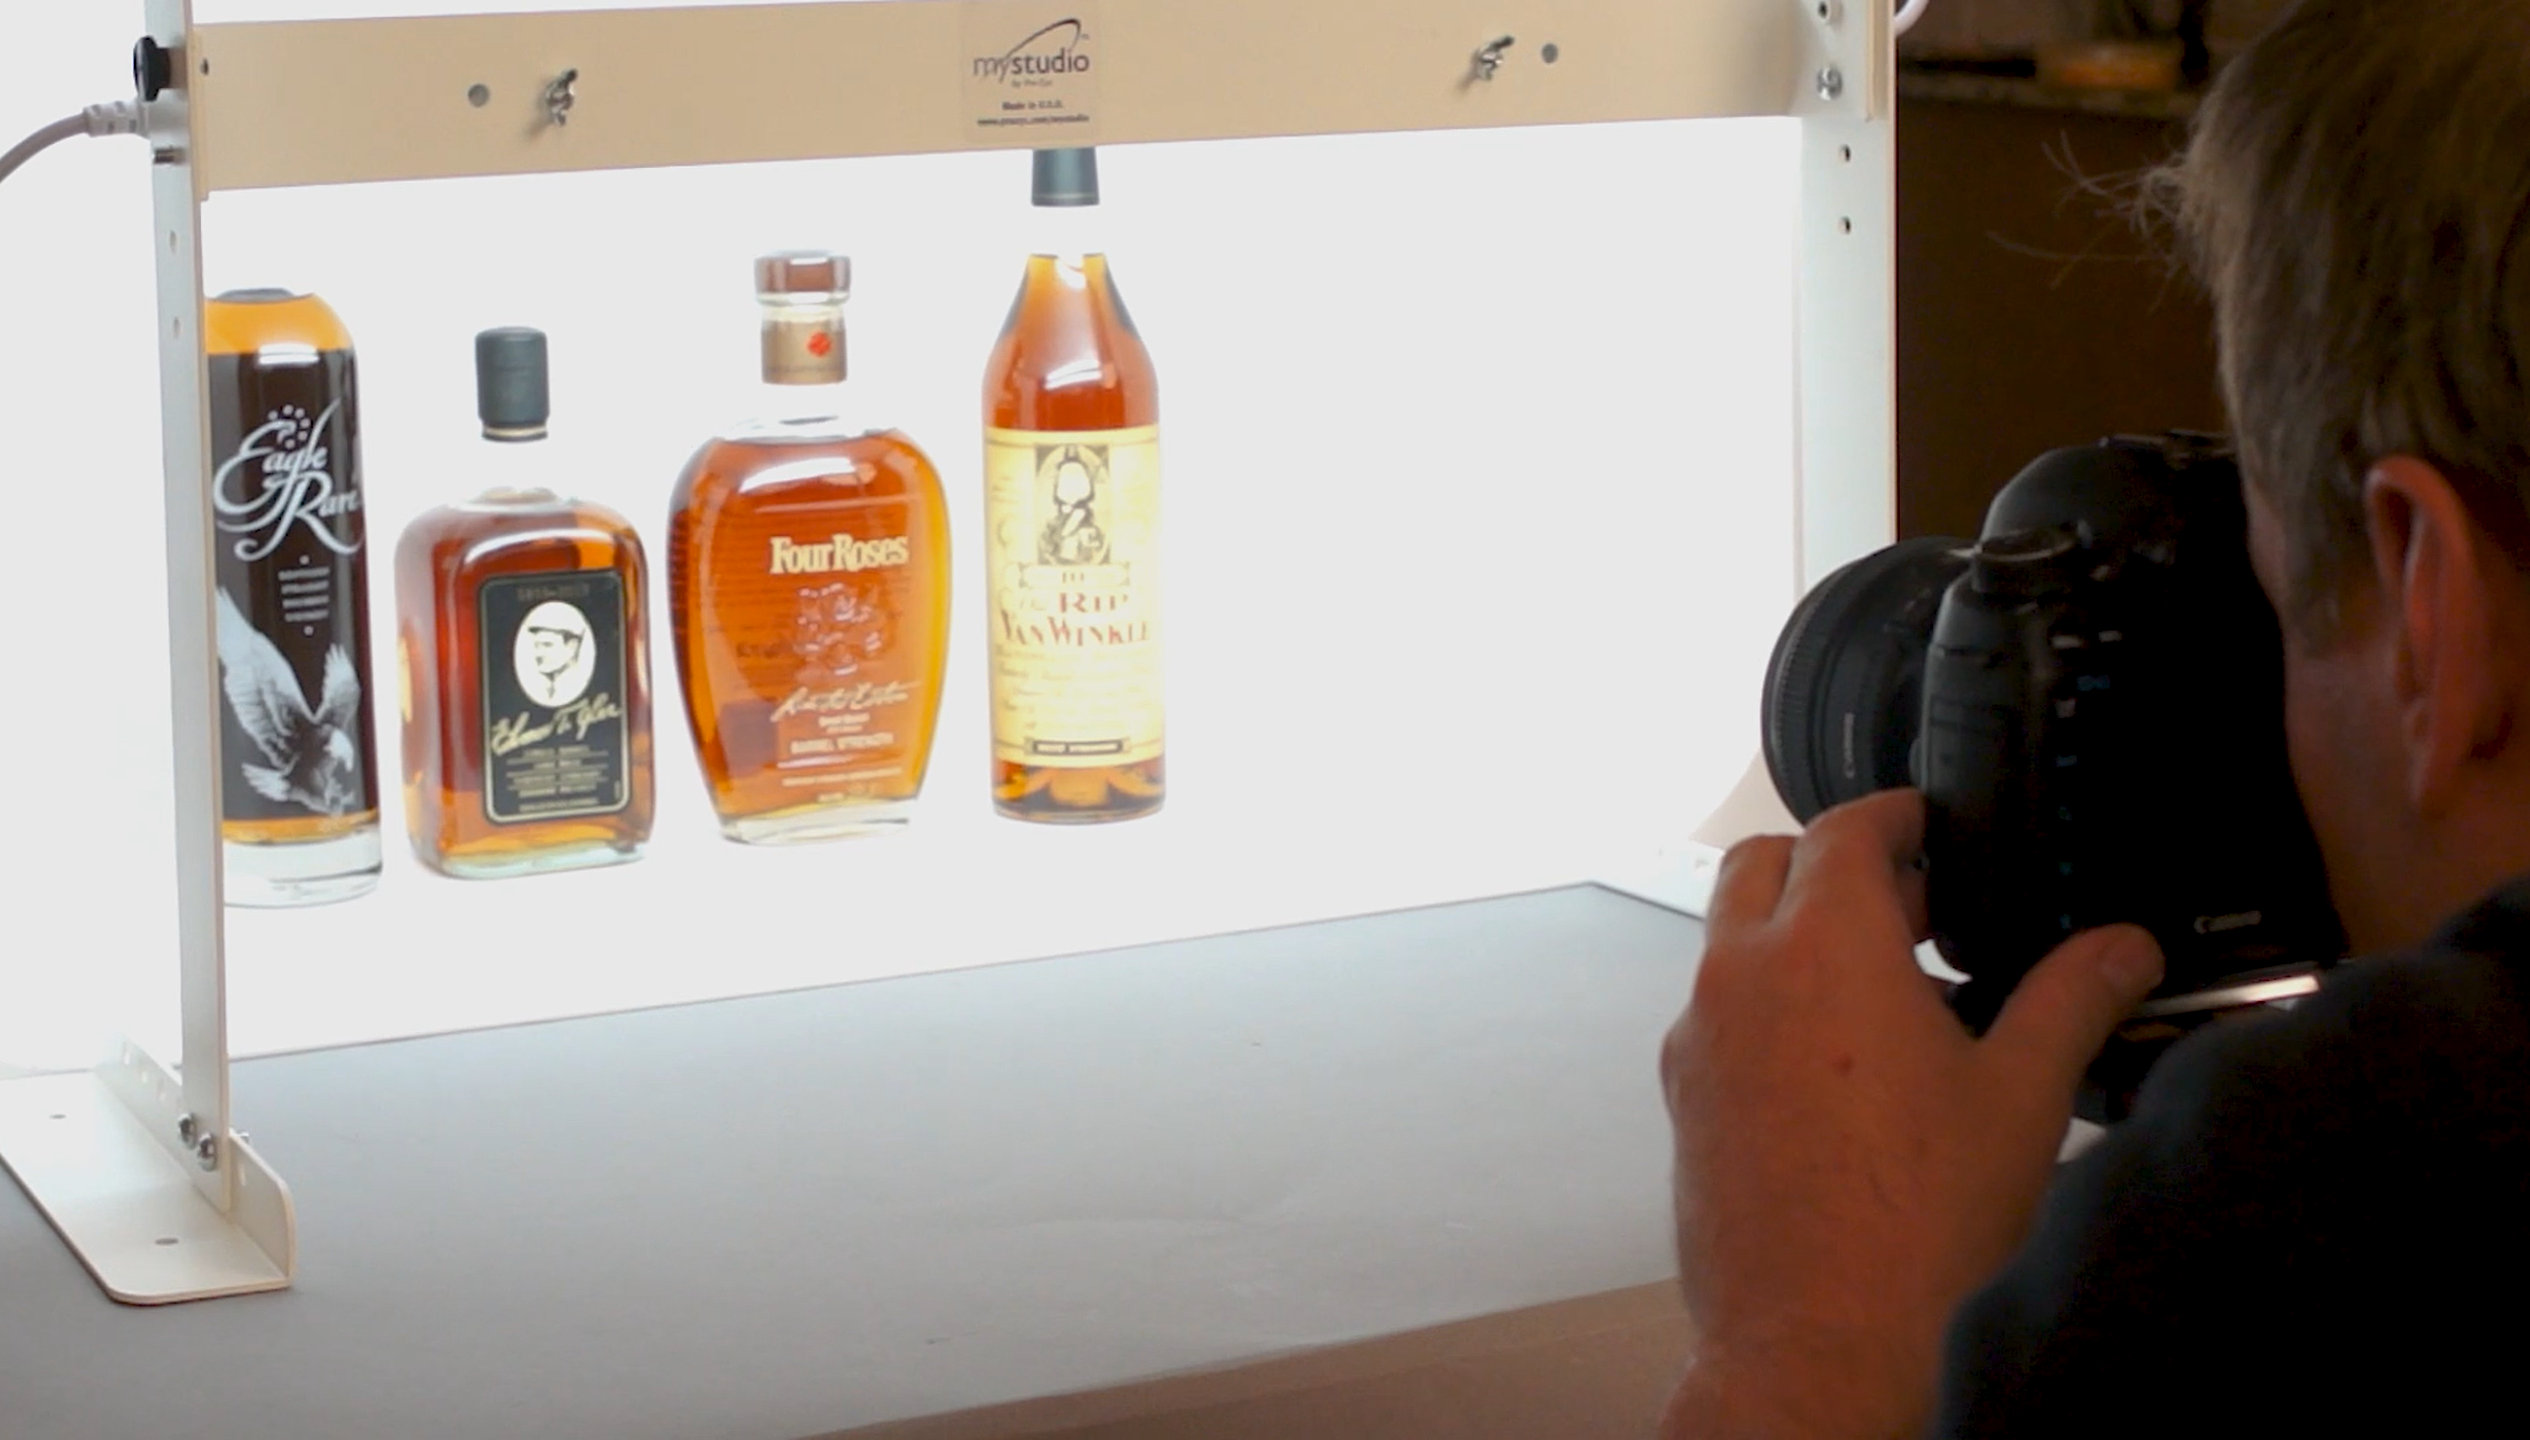
- Mastering Natural and Artificial Light: While natural light has its charm, it’s not always consistent. A set of adjustable studio lights can be your best pals in product photography. I remember shooting artisanal chocolates where artificial light accentuated their glossy texture – something natural light failed to capture. I also recall once shooting a line of handcrafted jewelry and how my trusty LED lights brought out the sparkle that natural light just couldn’t.
- Direction Matters in Product Photography: Side lighting can emphasize texture, while front lighting reduces shadows. Play around to see what flatters your product the most.
- Diffuse Like a Pro: Direct light can be harsh. Use diffusers to soften it. You can even DIY with parchment paper or a white curtain.
Mistake 2: Ignoring Composition Rules in Product Photography
The Art of Arrangement
Composition in product photography isn’t just about placing things in the frame; it’s about storytelling. It’s an art form that subtly guides the viewer’s gaze and enhances the overall aesthetic.
Solutions:
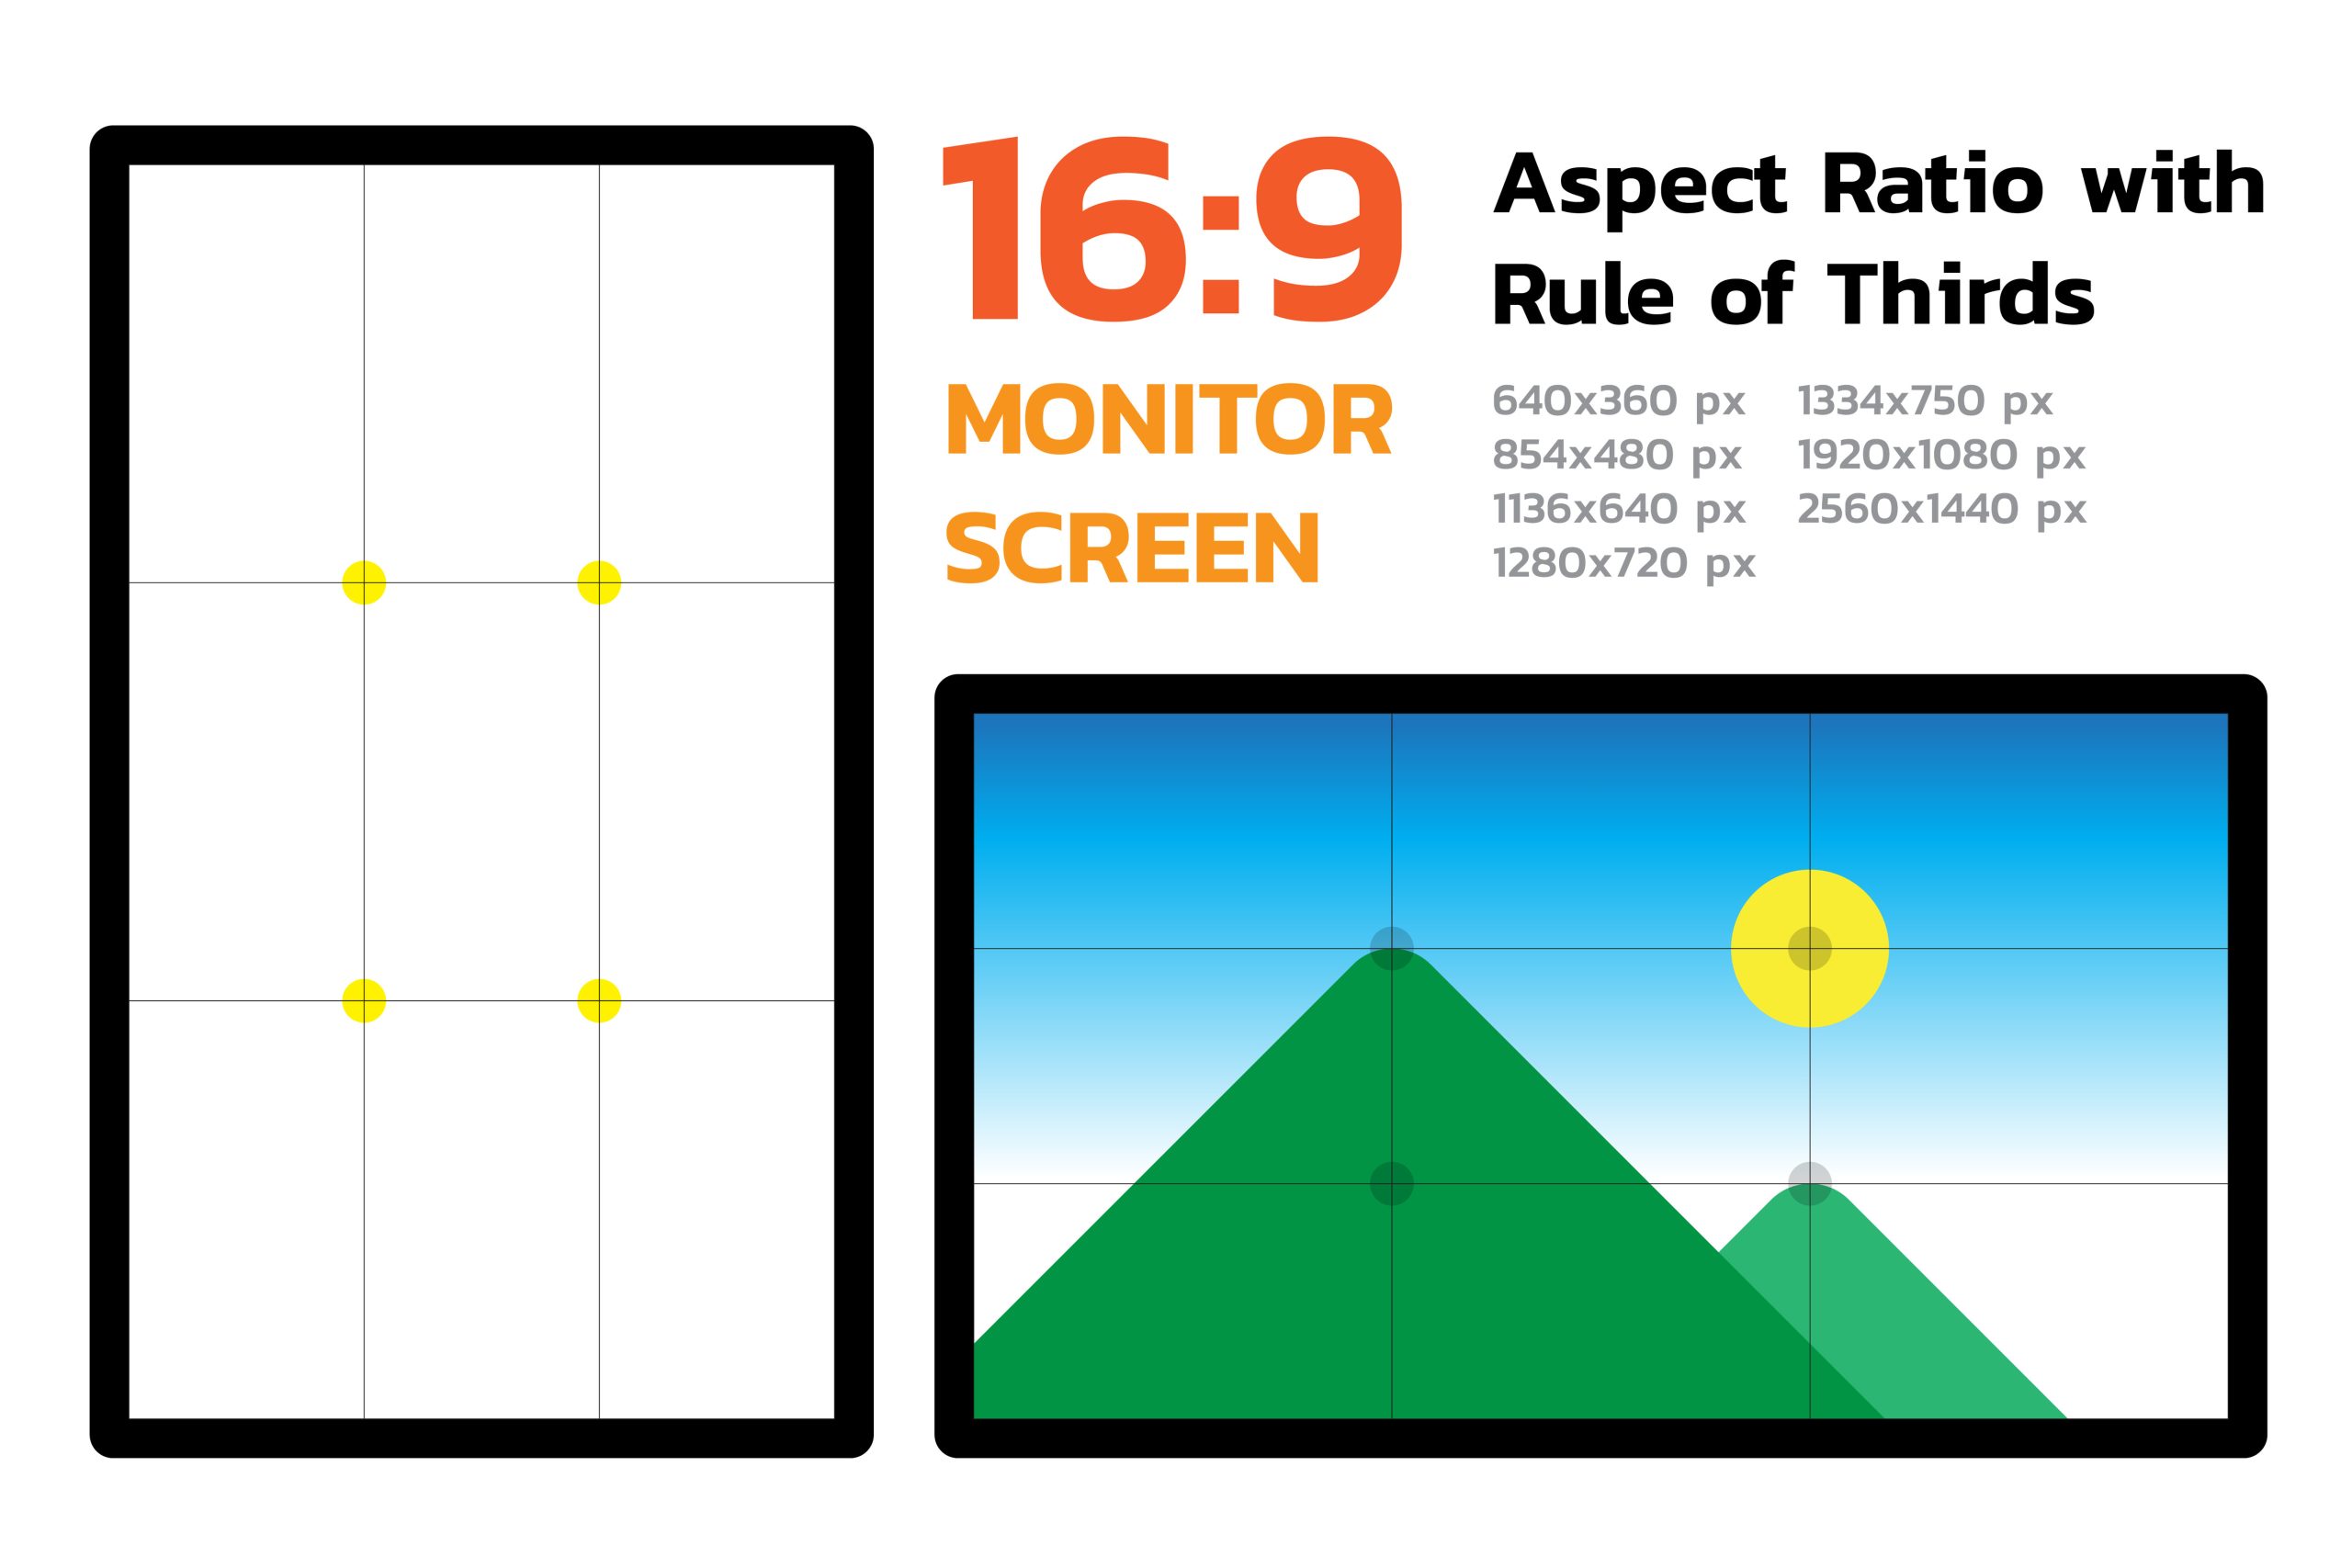
- Embracing the Rule of Thirds in Product Photography: This age-old rule helps in creating balanced and interesting shots. Imagine dividing your frame into nine equal segments. Placing your product along these lines creates balance. I’ve had shots transformed by just shifting the product slightly off-center. For a “works every time” trick, try placing your product at the intersections of these lines for an instant uplift in composition. To see it in action, I made a little YouTube Short that includes the Rule of Thirds: Tip to make photos FEEL “expensive”.
- Utilizing Leading Lines and Negative Space: These elements can be incredibly powerful. Leading lines draw the viewer’s eye to the product, while negative space (the empty area around your subject) can help your product stand out. I once used the curve of a spiral notebook to lead the eye towards a sleek pen – simple yet effective.
Mistake 3: Inconsistent Backgrounds in Product Photography
Setting the Perfect Stage
A haphazard background in product photography can be a visual cacophony, distracting from your main subject. Consistency in backgrounds is not just about aesthetics; it’s about brand identity.
Solutions:
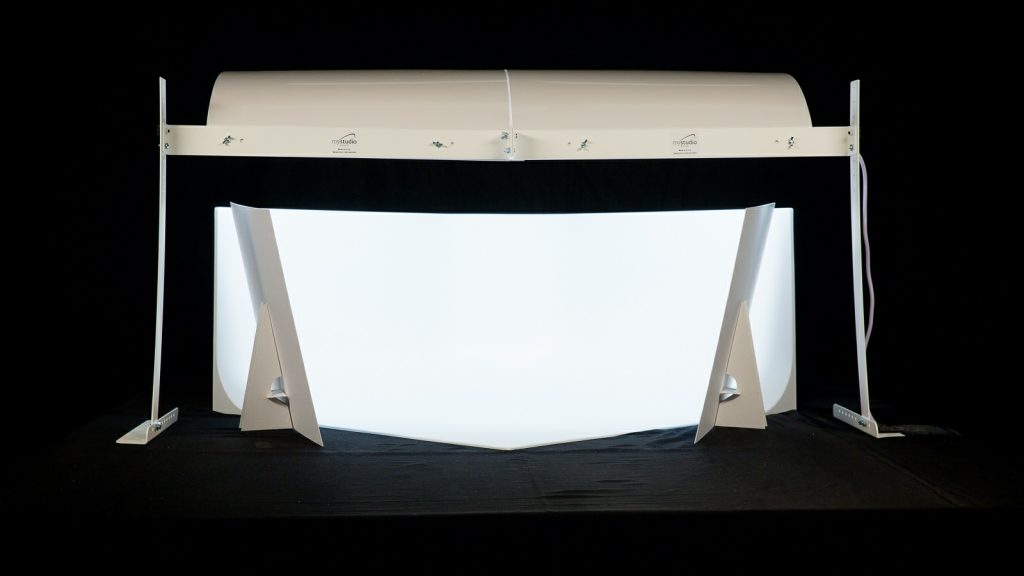
- Choosing the Right Backdrop: Whether it’s a seamless paper, a textured fabric, or a themed set-up, ensure it complements the product. For a vintage watch collection, I used an old-world map as a backdrop, which added character and context. However, my go-to is this seamless white background. I use it primarily for shoes, jewelry, and cosmetics to make them pop. There’s a reason why Nike, Adidas, Tiffany & Co., and other big brands use a seamless white background in their product photography. Amazon even requires it for all product images.
- Keeping It Cohesive: If you’re shooting a series, maintain a consistent theme or color palette. This doesn’t mean you can’t be creative, but there should be a visual harmony that ties your images together.
Mistake 4: Overlooking Post-Processing in Product Photography
Polishing Your Visual Stories
Post-processing is not just about correction; it’s an extension of your creative vision. It’s where you can fine-tune and bring your artistic intent to full fruition. The difference between an image straight out of the camera vs. after a little post-production editing may seem small but can have a big impact on the final product photo.
Solutions:
- Balancing Edits: Adjust brightness, contrast, saturation, and sharpness judiciously. Remember, subtlety is key. If you’re taking your product photos on an iPhone, I made a YouTube Short about the 3 settings on which I would focus that you can see here: 3 editing steps when on a time crunch.
- Retouching Responsibly: Remove dust, scratches, or unwanted reflections, but stay true to the product’s reality. I had an incident where removing a minor blemish altered the texture of a leather bag, misleading customers.
Mistake 5: Neglecting the Target Audience in Product Photography
Visual Communication with Your Audience
Your product photos should not just ‘show’ the product; they should ‘speak’ to the potential buyer. Understanding your audience is critical in crafting images that resonate.

Solutions:
- Audience Research: Dive deep into your audience’s preferences. Are they minimalists or maximalists? Do they prefer a modern or a rustic vibe?
- Aligning Photography with Brand Voice: The style, mood, and even the props used should be in harmony with your brand’s voice. For a high-tech gadget, I used a sleek, modern setup that echoed the product’s innovative features.
Additional Tips for E-commerce Success
Beyond the Basics
To really up your game, consider these additional aspects:
- Consistency in Angles and Framing: Keeping a uniform angle and frame for each product adds to a professional and cohesive look. Create a template or guide for consistency. Fun fact: If you go to Nike’s website, all of their shoes point to the left. However, on Adidas’ website, the shoes all point to the right.
- Utilize Props Wisely: Props can add context and appeal, but they shouldn’t overshadow the product. Choose props that complement without competing. Again, an all white background is almost never a bad idea for product photography. It’s even often preferred.
- Interactive Elements: In today’s digital age, consider incorporating elements that can work well on social media or interactive platforms, like 360-degree views or zoom-in features. This isn’t always as cost-effective but boy, is it fun to play with.
Conclusion
Remember, the path to perfect product photography is paved with trials and errors. Each mistake is a learning opportunity, a chance to refine your craft. Keep experimenting, keep learning, and most importantly, keep enjoying the process. Your passion and dedication will shine through your work, turning simple photographs into powerful sales tools in your product photography. Here’s to creating images that don’t just display products, but tell their unique stories. Happy shooting!