

Since the early days of the Internet in the late 1990’s, the number of products that are sold and purchased online through various types of ecommerce websites has exploded. More and more people are drawn to the convenience and efficiency of ordering products online without ever seeing them in person. This means that potential customers have of gathering information on a product before purchasing is through descriptions, photos, videos and reviews from other customers. Of these, product photos remain one of the most important factors that customers rely on when deciding whether or not to purchase a product. That means that good product photography is one of the most essential components when it comes to selling a product online, and why it is critical to make sure your portable light box photography is the best it can be.
Most items that are sold online are small enough to be shipped efficiently; therefore there are large number of small items and products that need to be photographed. And due to increasing competition in almost all sectors of the marketplace, if one is selling small products online, it is more critical than ever to have the best product photos possible to set your products apart from the competition. When it comes to small product photography, including but not limited to, jewelry photography, it is essential to have the right tools at your disposal to create the best possible product photos, as well as knowing how to use them. Below are some of the top tips from successful photographers on how to take the best product photos without hiring a professional photographer or spending tons of money, namely by using table top product photography kits for their light box photography.
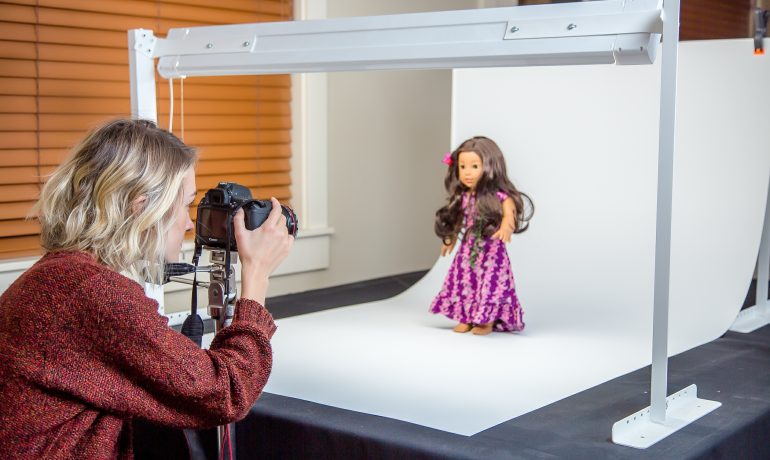
Use a Quality Table Top Light Box for Photography with a Seamless White Background
When it comes to small product photography and a photography lighting kit, a full-size photo studio is not necessary. One can get the same benefits that are found in professional studios with a high-quality portable product photography lightbox kit. The best tabletop product photography kits feature some kind of seamless white background (some include the possibility to add different color backgrounds, but white is the most important), as well as some kind of photography lighting kit that is included. Once you have a quality seamless background and decent quality lighting, all that remains to achieve great light box photography is learning how to use those tools to create a great product photo.
Use “Daylight” Lighting and Large Lights (relative to the product size)
With very rare exception, soft lighting, without harsh shadows or glare, is the preferred type of lighting in product photography and light box photography for jewelry. Soft lighting provides even and accurate light that is most pleasing to the eye and captures the product in the most flattering way. Soft lighting is created by using a product photography lighting kit with lights that are large relative to the size of the product, and placed quite near to the product. Small lights like a flashlight or small spotlight create undesirable hotspots, glare and shadows that can distract from the image. If the only lights you have are small, one thing you can do is place a larger piece of translucent diffusion fabric in front of the light which will soften and make the light appear larger.
Finally, the color temperature of your lighting should be in the “daylight” range of around 5000K – 5500K. This color temperature is very neutral and will most accurately reproduce the color(s) of your product. The best portable lighting kit for photography will have both of the above features included.
Use a Quality Lens with an Effective Focal Length of at Least 50mm
In order to capture your product in the most flattering perspective, it is important that you do not use a wide-angle lens which can distort the dimensions and appearance of your product. Instead, make sure you are using an “effective focal length” of at least 50mm and preferably closer to 75mm. On a full frame camera, the focal length stated on the lens will be exactly the focal length you will get. However, many DSLR cameras have smaller sensors with a “crop factor” that actually multiplies the focal length of your lens. For example, if you put a 50mm lens on a camera with a 1.5x crop factor, the effective focal length will be 75mm, which can actually help in product photography. If you are using a smartphone camera, make sure to use the zoom feature to about 2x magnifications. On most smartphones that will give you an effective focal length of between 50mm – 60mm. But don’t zoom much past 2x because that will affect the quality of your photo.
Learn to Shoot in Manual Mode to Control and Optimize Exposure
When doing light box photography, it may seem easiest to use the Auto Exposure mode on your camera. However, best results will be achieved by learning to shoot in Manual Mode and taking control of the exposure settings to achieve a professional looking product photo. This is especially important when using a portable light box with product photography light box kit and a white seamless background. Because of the way camera sensors are programmed, they automatically create an exposure that turns white into gray, which will create an underexposed (too dark) image when you are using an all-white background. By using Manual Mode, you can change the settings, such as lowering the shutter speed or increasing the ISO, to brighten your image and bring out the white background which will best showcase your product. Even if one is using the best portable lighting kit for photography, it is still important to be able to control the exposure in Manual mode to get the best results.